
Horizon Cloud (Next-gen) on Microsoft Azure (Updated on Mar 2026)
- Barry Ling

- Apr 2
- 8 min read
Since the admin UI of Azure has been updated by Microsoft, today I will also update the Horizon Cloud (HoC) deployment procedure base on the new Azure UI.
The solution of Horizon Cloud on Azure includes 2 major components; Horizon Cloud Control Plane and Azure Subscription.

The Cloud Control Plane is hosted by Omnissa and mainly used by administrator for admin job like create image, desktop provisioning, user entitlement and etc. No VDI session or user data will route through the Cloud Control Plane. All VDI traffic will directly talk through the Unified Access gateway (UAG) located within the Azure tenant.
Besides Cloud Control Plane, user will required to have their own Azure subscription to host the management components and VDI desktops. This model is named as Bring Your Own Subscription model.
The Horizon Cloud solution will deploy a management component "Horizon Edge Deployment" on Azure. The component includes the following items. This blog will walk through the procedure of deploying following items.
Horizon Edge Gateway
Unified Access Gateways
Azure load balancer for UAG
The whole deployment procedure will involve following sections.
Let's go through one by one.
1. Create Resources Group on Azure
It is assumed you have your own Azure subscription ready for the deployment. The first step will required to create a dedicated Resource Group for the purpose.
Login the Azure Admin UI. Click the "Resources Group".
In search bar, input "Resources Groups"
Click the Resource Groups icon

Click "Create".

Assign a name for the Resource Group. And select the Azure data center for the deployment. Click "Review + create".

Click "Create"

2. Create Azure Network for HoC
Next step will be creating corresponding Azure Network. From my example, I will create a class B Virtual Network. And then create 4 class C subnet in it for different purpose as follow.
Class A Virtual Network (192.100.0.0/16)
Class B Management Subnet (192.100.1.0/24)
Class B DMZ Subnet (192.100.2.0/24)
Class B VDI Subnet (192.100.3.0/24)
Class B Server Subnet (192.100.4.0/24)
In search bar, input "Virtual Network"
Click the Virtual Network icon

Click "Create".

Select the Resources Group created in section 1. Assign name for the newly create Virtual Network. Click "Next" until "IP addresses" tab..

Assign the IP range for the Class B Network. Click "+ Add a subnet".

The first subnet created will be the management subnet. Assign a name for the subnet. Assign corresponding IP range.
Click "Add".

Create the remaining 3 subnets with same procedures.
Make sure all 4 subnets are added. Click "Reviewed + create".

Click "Create".

Virtual Network and subnets will be created.

Click the "DNS" tab of the Virtual Network. Add corresponding DNS server. Here I am adding the IP address of the Domain Controller I am going deploy in later sections.
Click "Save".

3. Configure the Network Security Groups (NSGs)
To allow VDI related traffic between each subnet created, corresponding NSGs will be required. Following is a list for reference.
VDI Subnet → Server Subnet: Must allow ports for Domain Join and Authentication (TCP/UDP 53 for DNS, 88 for Kerberos, 135, 389, 445, etc.).
Management Subnet → Server Subnet: The Horizon Edge Gateway/Pod Manager needs to talk to the Domain Controller to browse OUs and manage computer accounts.
DMZ Subnet → VDI Subnet: The UAGs in the DMZ need to talk to the desktops in the VDI subnet on ports 4172 (PCoIP) or 443/8443 (Blast).
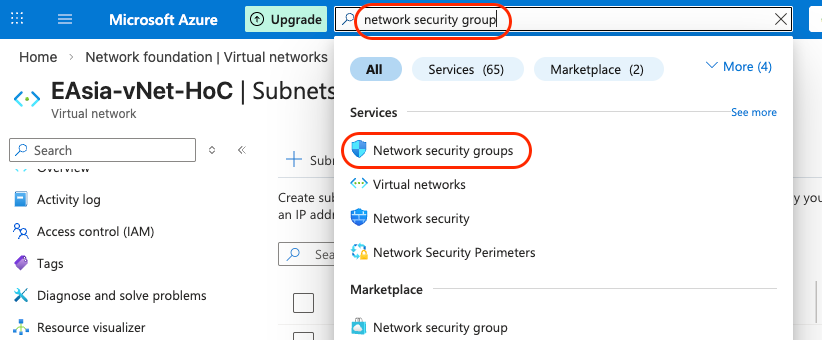
In search bar, input "Network Security Groups".
Click the Network Security Groups icon.
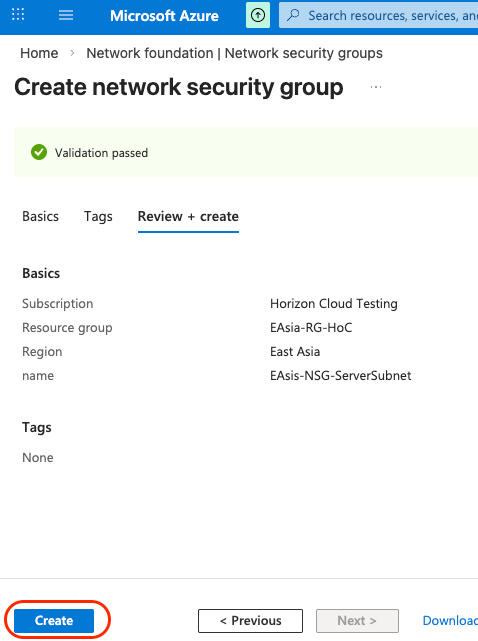
Click "Create".

Select the Resources Group of the VDI deployment.
Adding a name for the NSG of Server subnet.
Click "Review + Create".

Click "Create".
Repeat the same procedure to create 4 NSG as following.

And then you need to create corresponding rules for each subnet.
Rule for EAsis-NSG-ServerSubnet:
Priority | Name | Source (IP) | Destination (IP) | Service | Port | Protocol |
100 | AllowAD_DNS | 192.100.1.0/24, 192.100.3.0/24 | 192.100.4.10 | Custom | 53, 853 | Any |
110 | AllowAD_Auth | 192.100.3.0/24 | 192.100.4.10 | Custom | 88, 464 | Any |
120 | AllowAD_RPC | 192.100.3.0/24 | 192.100.4.10 | Custom | 135 | TCP |
130 | AllowAD_LDAP | 192.100.1.0/24, 192.100.3.0/24 | 192.100.4.10 | Custom | 389, 636 | Any |
140 | AllowAD_SMB | 192.100.3.0/24 | 192.100.4.10 | Custom | 445 | TCP |
150 | AllowAD_High | 192.100.3.0/24 | 192.100.4.10 | Custom | 49152-65535 | TCP |
Rule for EAsis-NSG-VDISubnet:
Priority | Name | Source (IP) | Destination (IP) | Service | Port | Protocol |
100 | AllowUAG_Blast | 192.100.2.0/24 | 192.100.3.0/24 | Custom | 443, 8443 | Any |
110 | AllowUAG_PCoIP | 192.100.2.0/24 | 192.100.3.0/24 | Custom | 4172 | Any |
120 | AllowEdge_Mgmt | 192.100.1.0/24 | 192.100.3.0/24 | Custom | 443, 31883 | TCP |
130 | AllowEdge_SSO | 192.100.1.0/24 | 192.100.3.0/24 | Custom | 32443 | TCP |
Rule for EAsis-NSG-DMZSubnet:
Priority | Name | Source (Tag) | Destination (Tag) | Service | Port | Protocol |
100 | AllowHTTPS | Internet | VirtualNetwork | HTTPS | 443 | TCP |
110 | AllowBlast | Internet | VirtualNetwork | Custom | 8443 | Any |
120 | AllowPCoIP | Internet | VirtualNetwork | Custom | 4172 | Any |
Rule for EAsis-NSG-MgmtSubnet:
Priority | Name | Source (Tag/IP) | Destination (IP) | Service | Port | Protocol |
100 | AllowVNet_API | VirtualNetwork | 192.100.1.0/24 | HTTPS | 443 | TCP |
110 | AllowUAG_Mgmt | 192.100.2.0/24 | 192.100.1.0/24 | Custom | 9443 | TCP |
120 | AllowAzure_LB | AzureLoadBalancer | 192.100.1.0/24 | Custom | * | Any |
To create those rules, click EAsis-NSG-ServerSubnet.

Click "Inbound security rules".
Click "Add".

Create the rules by following the table above.
Click "Add".

Repeat the procedure to ready all rules under each NSG.


Then you can associate the NSG to corresponding subnet.
Click the "Subnet".

Click the "Associate".
Select the corresponding subnet.
Click "OK".

Repeat this procedure for all NSG created.
4. App Registration and Create Secret on Azure
After created the NSG, next step will be create the App Registration.
In search bar, input "App Registrations".
Click the App Registrations icon.

Click "New Registration".

Assign a name for the Registration. Click "Register".

The App Registration will be created with details. Please copy or write down following information. Those will be required for later steps.
- Application ID
- Object ID
- Directory ID

Go back to the Azure main page. Click "Subscriptions".

Click the subscription using for this deployment.

Click "Access control (IAM)" tab. Click "Add" and "Add role assignment".

Select "Contributor". click "Next".

Select "User, groups, or service principal". Click "+ Select members".
Input the name of the App Registration just created in the search field. Select the App Registration and click "Select".

Click "Review + assign".

In search bar, input "App registrations".
Click the App registrations icon.

Select "App applications" tab. Click the App Registration created on previous section.

Select "Certificated & secrets". Click "New client secret".

Assign a name of the Secret. Select a expires period. Since this is a PoC setup, I just selected 24 months. You may select a suitable expiry time for a production setup.
Click "Add".

A secret will be created. Please copy or write down the Secret ID. It will be required for upcoming deployment steps.

5. Register Resource Provider on Azure
The last step on Azure is making sure all required Service Provider is enabled. Regarding the documentation, following Service Providers are required for Horizon Cloud deployment.
Resource Provider | Importance | Purpose in Next-Gen |
Microsoft.ContainerService | Critical | Required for AKS-based Edge Gateways. |
Microsoft.ManagedIdentity | Critical | Required for the User-Assigned Managed Identity. |
Microsoft.Compute | Critical | For VDI Desktops, UAG VMs, and the Edge VM. |
Microsoft.Network | Critical | For VNets, NSGs, Load Balancers, and NAT Gateways. |
Microsoft.Storage | Critical | For OS Disks, Image Templates, and FSLogix shares. |
Microsoft.KeyVault | Critical | For storing disk encryption keys and SSL certificates. |
Microsoft.Authorization | Required | For Role-Based Access Control (RBAC) assignments. |
Microsoft.Security | Required | Required for security posture monitoring and vulnerability compliance of the Edge and UAG nodes. |
Microsoft.ResourceGraph | Required | Powering the new "Horizon Intelligence" reporting. |
Microsoft.Resources | Required | Core Azure Resource Manager (ARM) operations. |
Microsoft.MarketplaceOrdering | Required | To accept terms for UAG and Windows images. |
Microsoft.DesktopVirtualization | Optional | Only needed if integrating with Azure Virtual Desktop (AVD). |
Details can referring the following document.
In search bar, input "Subscriptions".
Click the Subscriptions icon.

Click the subscription for this deployment.

Click "Settings" -> "Resources providers".
In Search Bar, input "Microsoft.ContainerService".
Check the Microsoft.ContainerService.

While for the registration complete and make sure the status of the Provider is Registered.

Repeat this procedure for all Resources Provided listed in the table.
6. Create NAT Gateway for Internet Access
Before actually deploying any VM or components on Azure, you need to create NAT Gateway to allow internet access from each subnets.
In search bar, input "NAT Gateway".
Click the NAT Gateways icon.

Click "Create".

Select the Horizon Cloud resource group.
Select the region placing the 4 subnets created for Horizon Cloud.
Click "Next".

Click "Add public IP addresses or prefixes".

Click "Create a public IP address".

Input a name for the public IP address.
Click "OK".

Click "Save".

Click "Next".

Select the Virtual Network created for the Horizon Cloud.
Check all subnets you want to grant access to internet.
Click "Next".

Click "Next".

Click "Create".

7. Deploy a Domain Controller
Deploy a VM. Use a standard Windows Server image (2019 or 2022). A B2ms or D2s_v3 size is usually sufficient for a dedicated DC.
Install AD DS. Inside the VM, open Server Manager > Add Roles and Features and select Active Directory Domain Services.
Promote to DC. Select "Add a new forest" during promotion.
Configure Sites and Services. Create a new "Site" in AD Sites and Services for your Azure IP range. This ensures Azure VDIs talk to the Azure DC first.
Set Up Service Accounts: You will need two accounts for the Horizon Console:
Domain Bind Account - Minimum "Read" permissions to look up users.
Domain Join Account - Permissions to create computer objects in your VDI OU
8. Horizon Edge Deployment
After completed all those Azure prerequisites actions, we will start the Horizon Edge deployment on the Horizon Cloud.
Login the Omnissa Horizon Cloud Control Plane with your Omnissa Connect ID.
Click "Horizon Edges" under Capacity tab.
Click "Start" -> "Horizon Cloud" -> "Microsoft Azure".

Input a name for this Horizon Edge.
Click "Next".

Provide corresponding Azure information created in above sections.
Click "Add".

If the Azure information is correct, it will show the Provider added successfully.
Click "Next".

Click "Next" to skip this optional configuration.

Click "Select".

Select the 3 subnets created for the Horizon Cloud deployment.
Click "Save".

Click "Next".

Input a site name.
Click "Next".

Select "Azure Private Link (Recommended)".
Select "Configure custom subnet" for App Volume Application Storage.
Check the 2 Permission boxes. Make sure you have followed the Omnissa KB to open up corresponding permissions.
Select the Virtual Network created for the Horizon deployment.
Select the Server subnet created for hosting internal servers.
Click "Next".

Since this is a PoC lab, i am choosing "Single Virtual Machine" for saving cost. In production environment, should choose AKS to have high availability.
Select the Virtual Network created for the Horizon deployment.
Select the Server subnet created for hosting management components.
Click "Deploy".

The deployment of Horizon Edge will kick start.
Click "Next".

Select "Basic" for the UAG deployment type.
There have 3 deployment type for UAG. You could choose the type you want. I am choosing the "External access over the internet" to let the UAG serving request from internet.
Enable "Automatic Public IP".
Input the External FQDN for this UAG.
Provide the 3rd party certificate for the deployment.
Select the VM model for the UAG.
And select the number of UAG going to deploy.

Select the corresponding subnets.
Click "Save".

After around 30 minutes, the Edge will be deployed and connected to Horizon Cloud Console.

9. Integrate the DC on Azure to Horizon Cloud Console
After deployed the Edge on Azure, you can now integrate the Domain Controller on Azure to the Cloud Console.
Login to the Horizon Cloud Console.
Click "Integrations" -> "Manage" under Identity & Access.

Click "Domains".
Click "Add".

Provide the short name and FQDN name of the domain.
Provide the LDAP path of default domain OU.
Click "Next".

Provide 2 AD bind user accounts. One is primary and the other is backup account.
Provide password for each account.
Click "Next".

Provide 2 AD join user accounts. One is primary and the other is backup account.
Provide password for each account.
Click "Next".

Click "Next".

Select "LDAP".
Click "Save".

The domain is now added to the Horizon Cloud Console.

----- END -----


Comments