
Deployment of Horizon Recording Server
- Barry Ling

- Mar 30, 2022
- 4 min read
Updated: Apr 13

Starting from Horizon 8 version 2106, recording feature is productized. It was firstly released through Fling with name "Session Recording".
Now it is officially named as "Desktop Recording". And you can obtain the installation execute from your Horizon download page.
Today I am going to show you how to deploy and configure the Desktop Recording feature.
1. Deployment of Desktop Recording Server
The first thing you need to is installing the Recording Server. It is a service running on top a Windows Server. I have prepared a fresh Windows 2019 server for the purpose.
You can download 2 related installation packages; Horizon Recording Server and Horizon Recording Agent; from the VMware download web site.
Please upload the Horizon Recording Server installation package to the Windows Server.
Login to the Windows Server.
Locate the Horizon Recording Server installation package.
Right click and select "Run as administrator".

An installation wizard will appear. Click "Next".

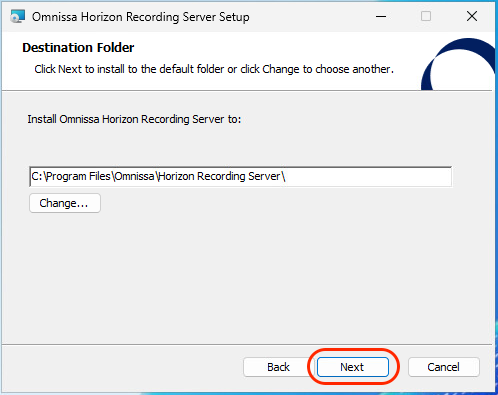
Select the destination folder for installation.
Click "Next".
*** Please be reminded that the recording video files will be placed within this folder by default. If you ar eplanning to place the recording video files on other location, you could do that through admin UI after the installation.
Click "Install".

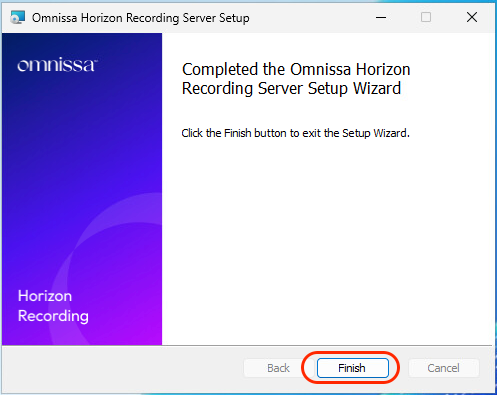
Wait for the installation process to complete.

Click "finish" to complete the installation.
You can now access the admin UI of the Recording Server with browser. The URL is similar as follow.
https://[Recording Server URL]:9443
The default username and password is administrator / Recording123.

2. Configuration of Desktop Recording Server
Once finished the basic installation, the next step will be configuring the Horizon Recording service.
Login to the Recording Server admin UI.
Click the "Administrator" on the upper right corner of the page.
Click "Service Setting".

Click "Authentication Settings". Select "General" tab. Select "Administrator". Click "Change Password" button.
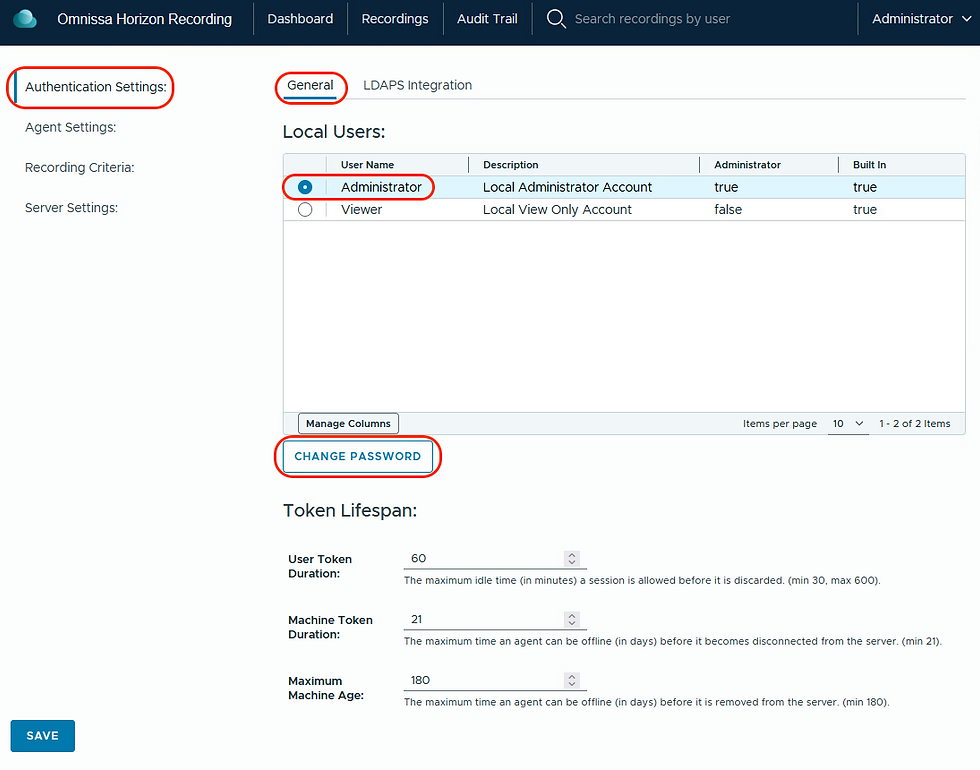
Input new password and click "Change Password".

*** Please perform the same actions for the "Viewer" account too.
Next step will be integrating the Horizon Recording server with Active Directory. Make sure you have created a corresponding AD account with user right to do AD query.
Click "LDAP Integration" tab.
Turn on "Enable LDAP integration" button.
Providing the corresponding AD LDAP information.
Click "Test Configuration".

Make sure the result of test successful showing true.
Click "Close".

Click "Client Settings". You may edit your own Notification Message here.

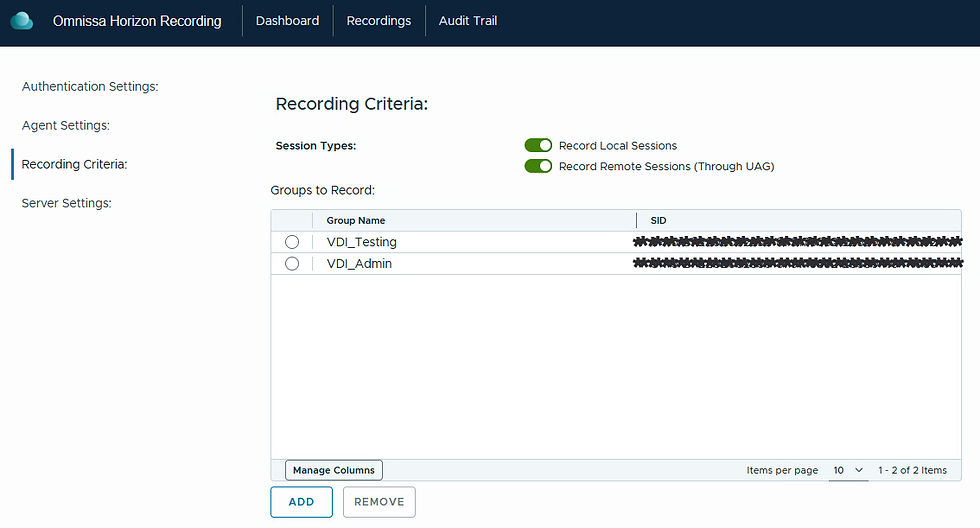
Click "Recording Criteria".
You can enable the recording for internal or external sessions by turning on corresponding buttons.
You can also add which AD group or user you would like to enable the recording by clicking "Add".

Search the AD account or group you want to enable the recording.
Select the target AD account or group.
Click "Add".
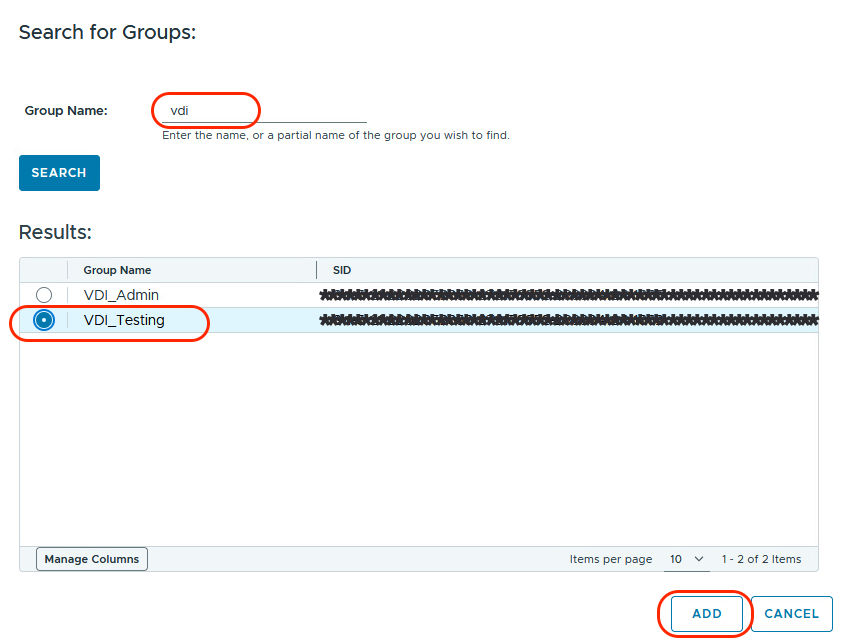
The AD account / group will be shown under "Groups to Record".
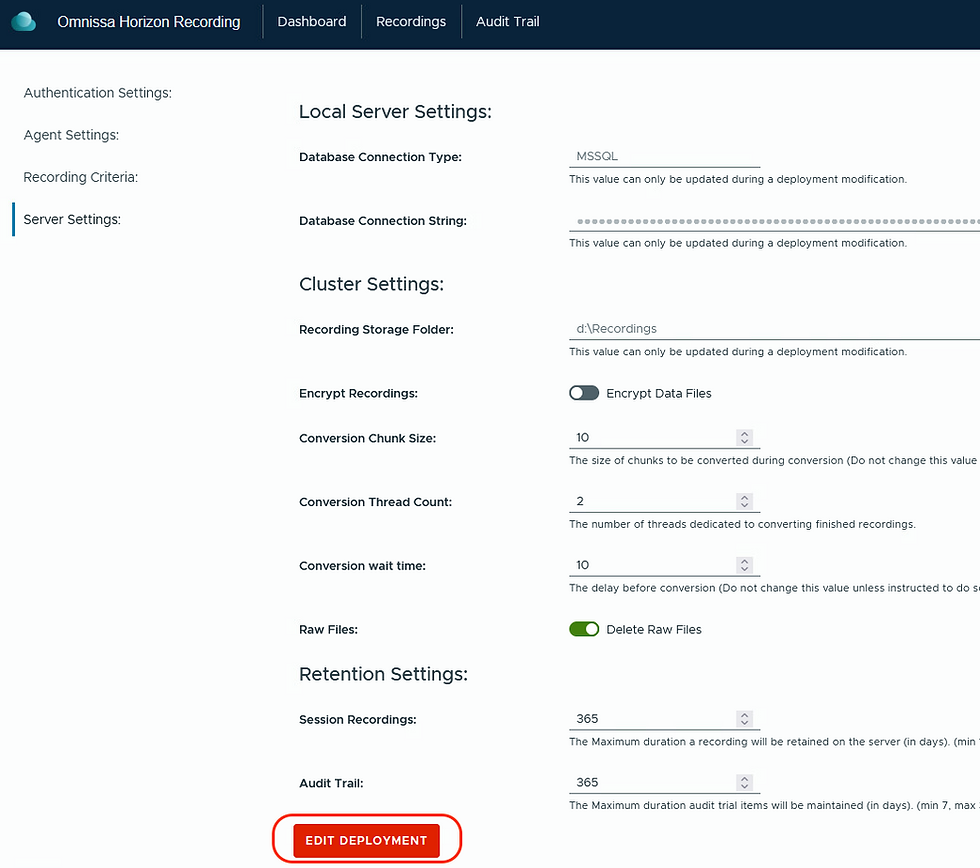
Click "Server Settings".
You can edit the SQL server setting by clicking the "Edit Deployment" button.
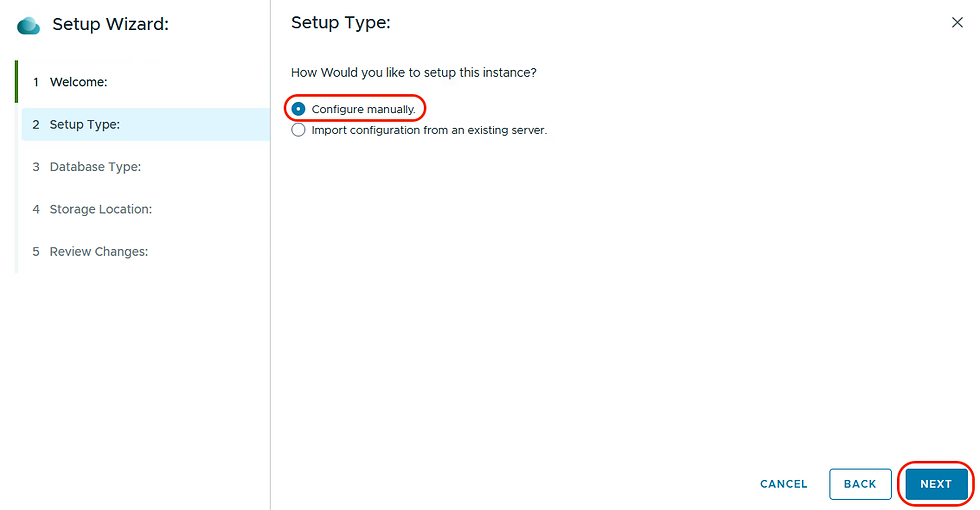
Click "Next".

Select "Configure manually".
Click "Next".
Select "Microsoft SQL".
Input the Connection String with following format.
user id=[SQL_account];password=[password];server=[MSSQL_FQDN];database=[DBName];Trusted_Connection=no;Encrypt=False
Click "Next".

Input the file path for storing the recording video files.
Click "Next".

Click "Save Configuration".

Wait until the configuration saved.

You can also adjust the session recording duration and the audit log retention period in the same page.
Once completed all above modification, click "Save".

3. Replacing the Self Signed Certificate
To replace the certificate. The first step will be purchasing and install the 3rd party certificate into the base Windows of the Recording Server. Since there already many online documents covering this part, I will skip this procedure and assume you have already purchased the 3rd party certificate and imported into the Recording Server.
Login the Windows OS of the Recording Server.
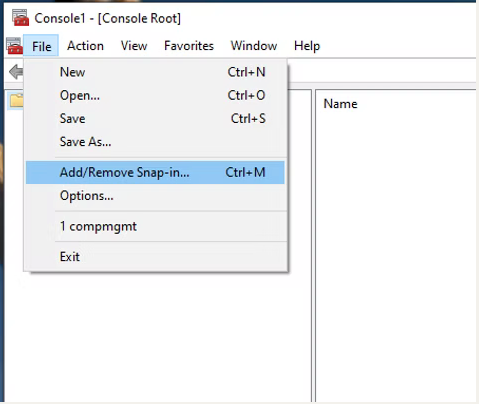
Open the command prompt and input "MMC". Press ENTER.

Within the MMC, click "File". Select "Add/Remove Snap-in".
Select "Certificate" and click "Add".

Select "Computer account". Click "Next".

Select "Local computer ......" and click "Finish"

Navigate to "Personal" -> "Certificate".
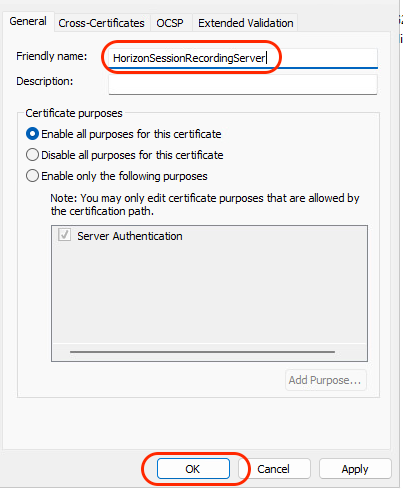
You will find a certificate with friendly name as "HorizonSessionRecordingServer".
Right click and select "Properties".

Rename the Friendly Name by adding "Org".
Click "OK".

Import your 3rd party certificate to the Personal store.
Locate the certificate and right click. Select "Properties".

Change the Friendly Name of the 3rd paty certificate to "HorizonSessionRecordingServer".
Click "OK".
Restart the "Omnissa Horizon Recording Server" service.

4. Deployment of Desktop Recording Agent
The last thing to do is installing the Recording Agent on VDI desktop.
Login to the Windows OS on VDI master image or the manual desktop.
Locate the Recording Agent installation package.
Right click and select "Run as administrator".

Click "Next".

Select the destination folder for installation. Click "Next".

Input the name of the Recording Server in following format.
https://[Recording Server FQDN]:9443
Input the username and password of the Recording Serve admin account.
Click "Register".
*** Please be aware that if the Windows machine is a master image for cloning, you must select "This machine is a template.

Click "Install".

Wait for the installation process to complete.

Click "finish" to complete the installation.

A notification message will be shown the next time the use login to thier VDI desktop or application. And the VDI session will be recorded by the Recording Server.
----- END -----


Comments